Embedded Files
I sell reeds to my students (and anyone elsewho might want them) for $15 each.
Apprenticeships are available.
No minimum age requirement.
My Process...
Click on pics to enlarge.
Soak cane overnight.
- Day 1 -
Shaping
Depending on the flavor of cane I prefer (which might change throughout the year), sometimes I get it shaped. If not, I'll shape the cane first using a fold-over shaper and a xacto kinfe.

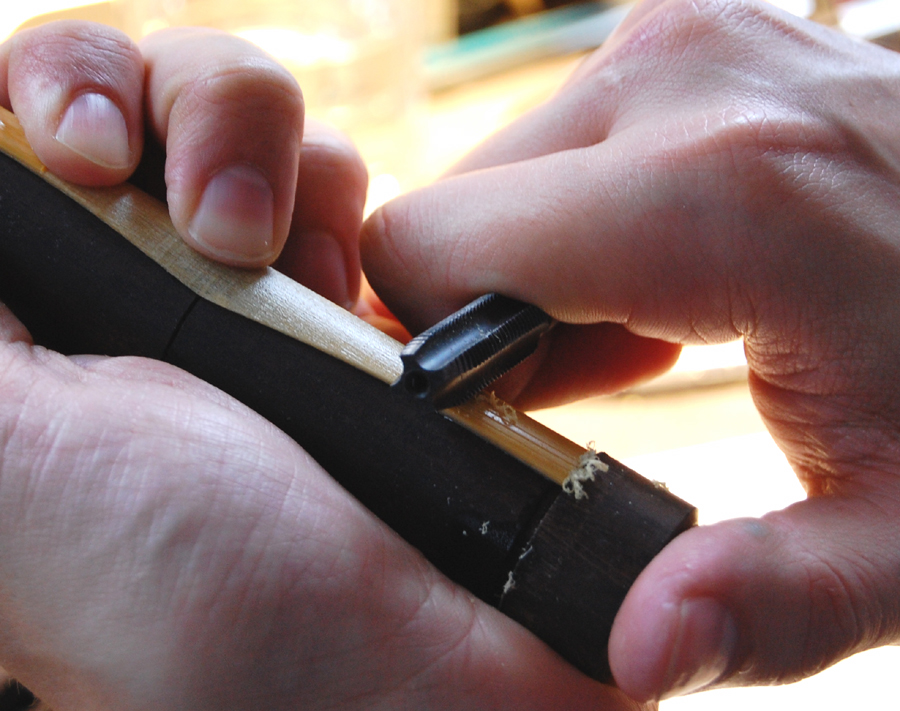
ScoringI score using a metal tap all the way from the 1st wire to the end of the cane. The tap creates evenly spaced channels instead of cuts. A true bassoon cane easel helps keep the cane in place without slipping.
Sanding
I sand the inside of the cane. Let's face it... this is really the only time you'll get to smooth it out before you fold it over and start forming. Some cane can have rather drastic imperfections in its surface that could use a little sanding.

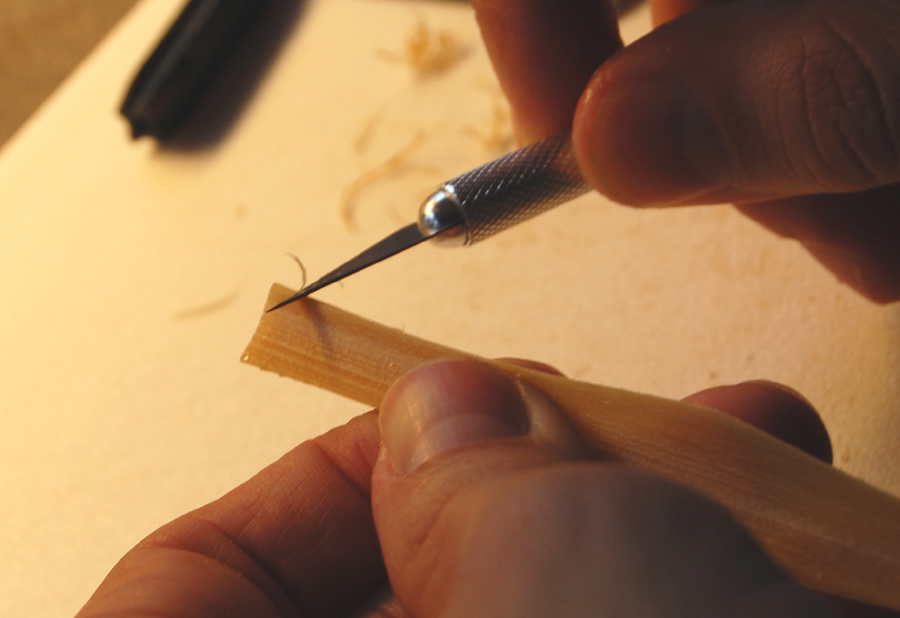
BevelingUsing a xacto knife, I bevel the last centimeter of all 4 edges. The angle is very slight, and the depth is tapered. This beveling helps ensure the tube creates a clean seal around the bocal.
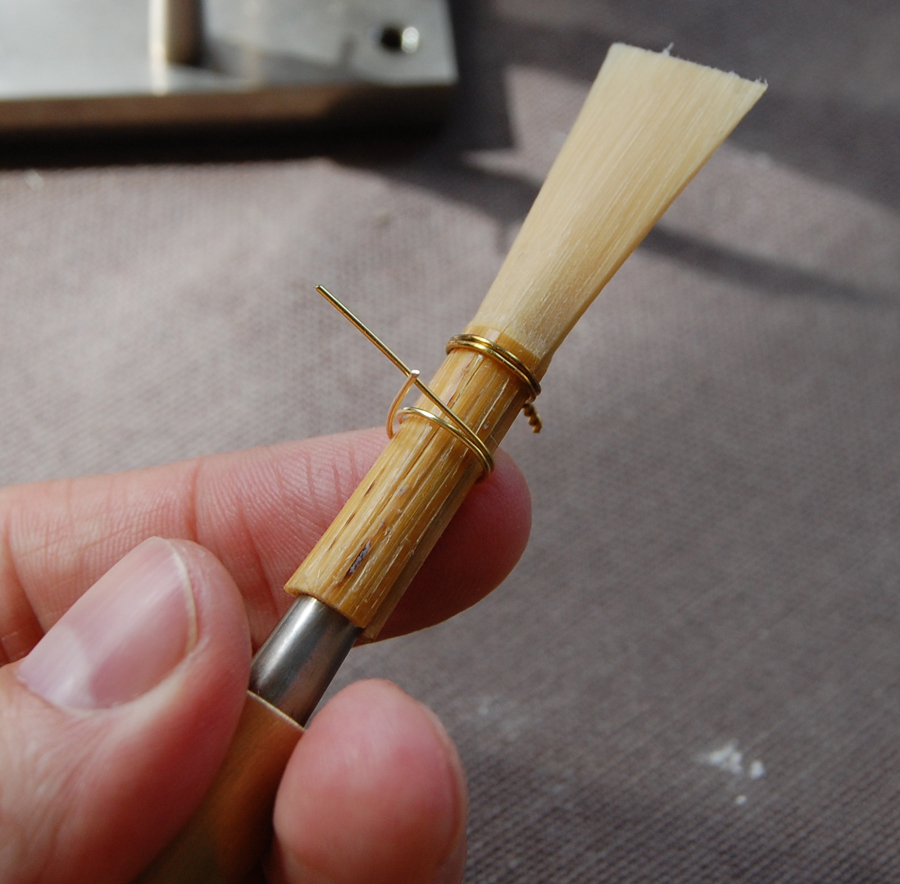
Wrap
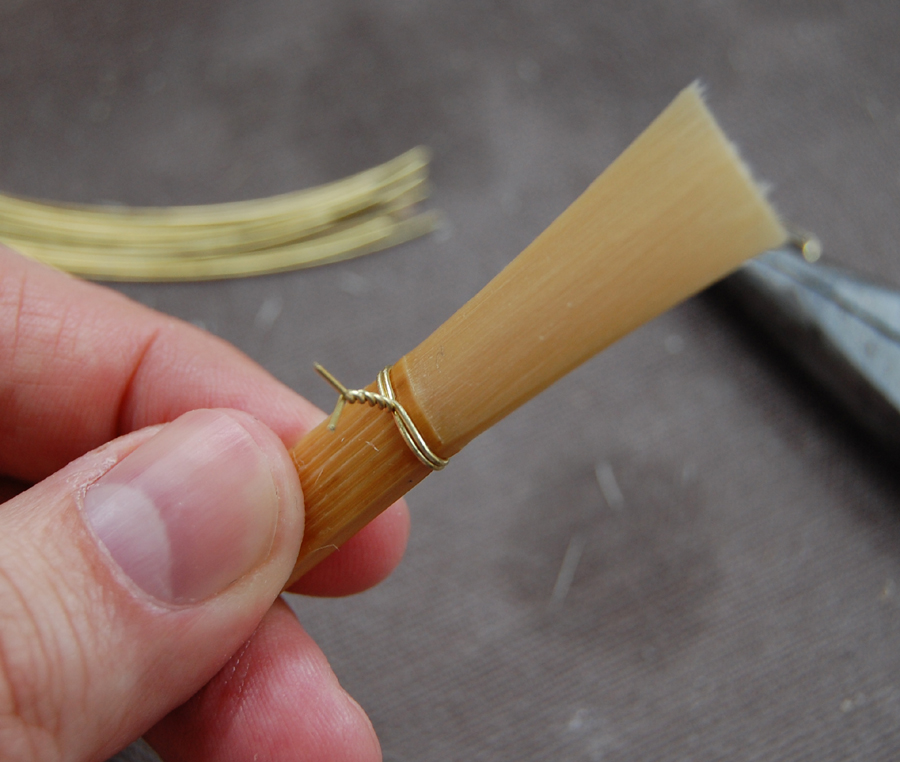
I attach the 1st wire made of 22 gauge brass. This wire is snug, but not tight. Over-tightening will cause the throat to get choked.
I wrap the reed with wet cotton string from the butt to the middle of the blades. This wrap helps prevent cracks from reaching the blades when the forming mandrel is inserted.
Forming Mandrel
A cold mandrel works fine; but, I like to use a hot mandrel to ensure no splits reach too deep into the blades. The heat makes the cane more pliable and less apt to crack.
The long mandrel tips from my drying rack fit perfectly into a soldering iron! First, I open the end of the reed, then enter the properly heated mandrel tip without twisting.

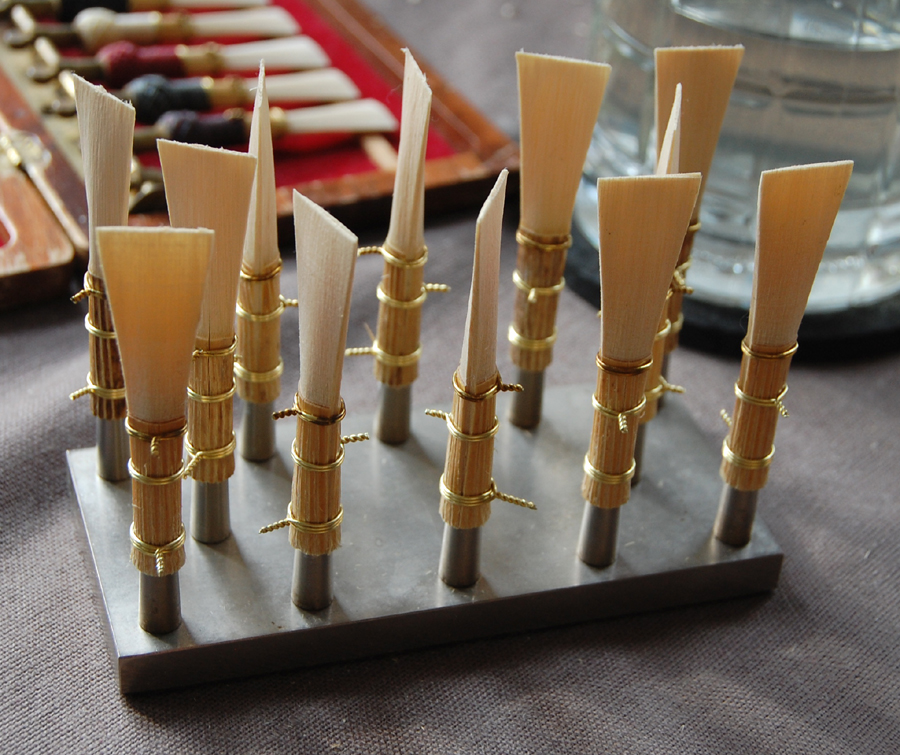
Set
After completing the forming mandrel process for 12 reeds, I let them sit... preferably for about a month. Having them sit this long helps to prevent any cracks in the tube from reaching the blades in the upcoming crimping process.
One month later... Soak wrapped blanks overnight.
- Day 2 -

Wires
After removing the cotton string, I attach the 2nd and 3rd wires. The 2nd wire, like the 1st wire, is snug but not tight - so the throat is not choked.
However, the 3rd wire I triple wind and can be very tight.

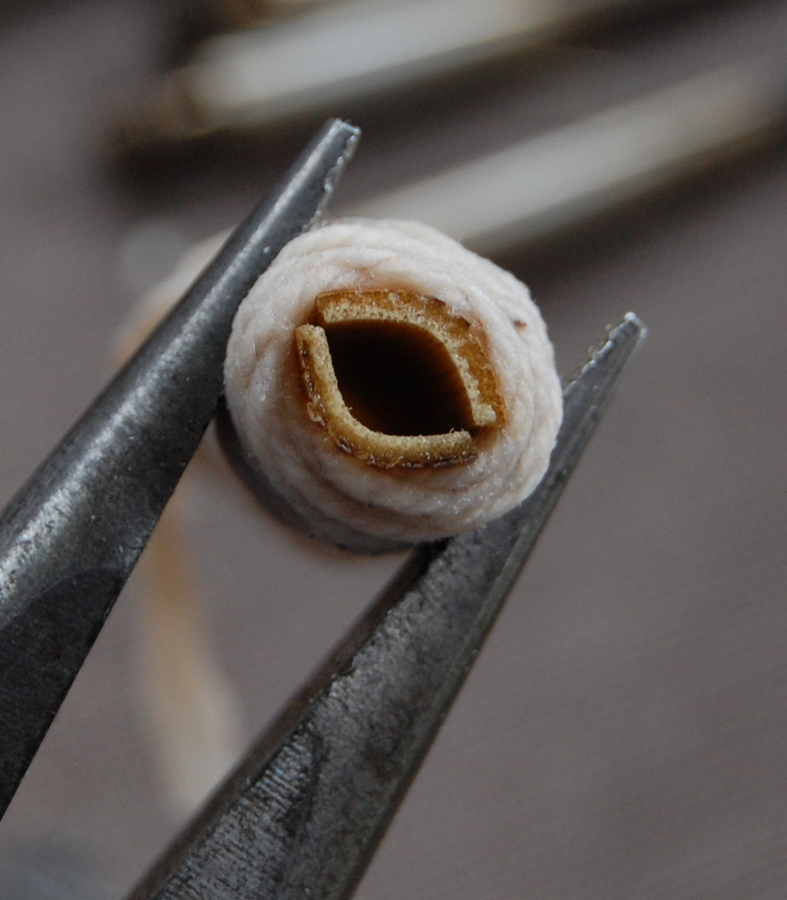
Crimping
To form the tube, I crimp below the 3rd wire first, then between the 2nd and 3rd wires, and then again below the 3rd wire. Crimping is achieved by squeezing the cane firmly, evenly, and thoroughly with needle-nosed pliers until it creates a uniform tube around the forming mandrel. The wires typically need some tightening afterwards. It's important to not over-tighten the 2nd wire. The 3rd wire can again be very tight.

Dry
After the 12 blanks are formed, I let them dry for a couple days before wrapping and sealing them. It's important to make sure they are completely dried out before adding any kind of sealant.
Two days later...
- Day 3 -
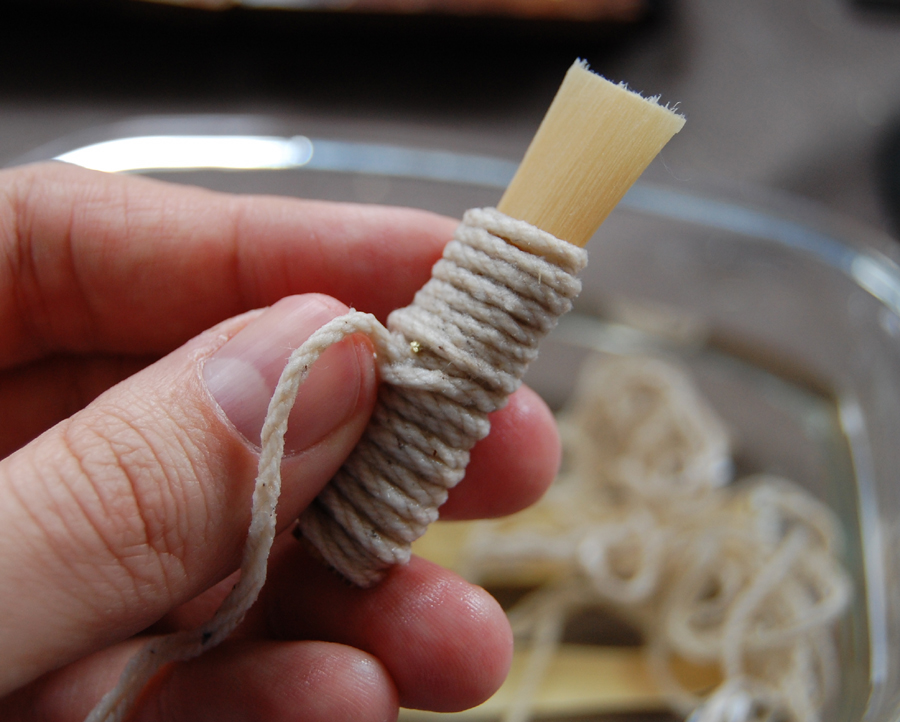
Wrapping & SealingI use cotton pearl thread because it soaks up whatever sealant is used better than nylon. After abandoning Duco cement for it toxicity, I've experimented with many non-toxic sealants. My favorite is water-based, clear nail polish. It applies easily with the brush applicator, and dries transparent and glossy.
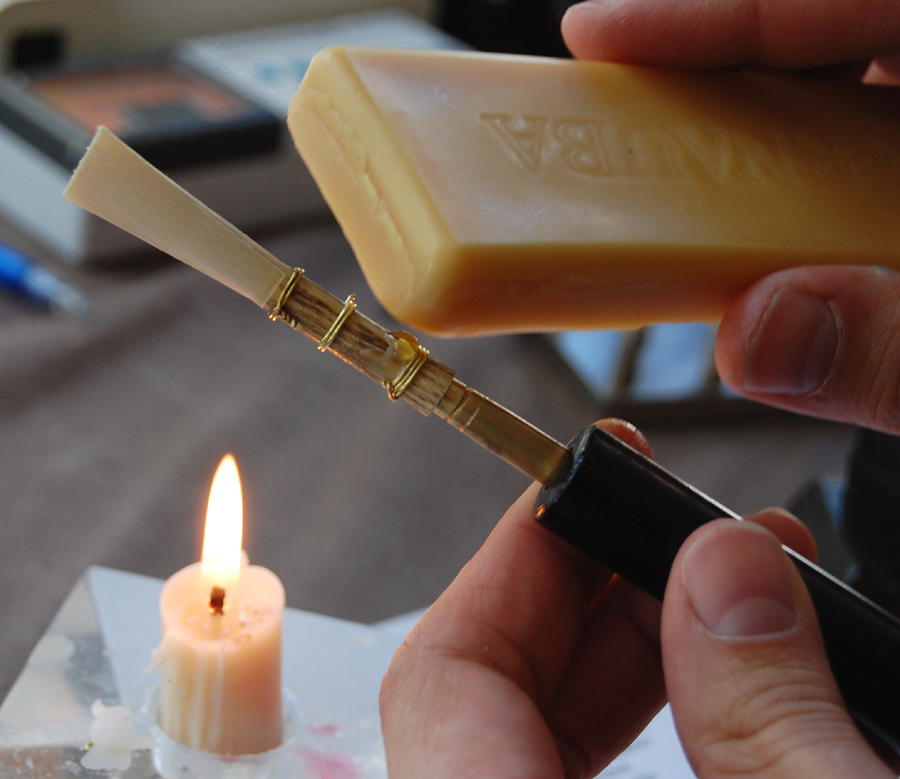
However, using wax is more interesting, so I'll describe
how to apply it here. Beeswax is soft and smells nice -
but it can leave a residue on your fingers when handling it.
Carnauba wax is harder and has no residue; but since its melting point is higher, it's a little more difficult to work with needing more heat to melt. I used carnauba wax in these pictures.

Whatever sealant I use, I start with a small amount of it
directly on the cane at the 3rd wire. This helps ensure the
thread adheres to the cane under the turban.
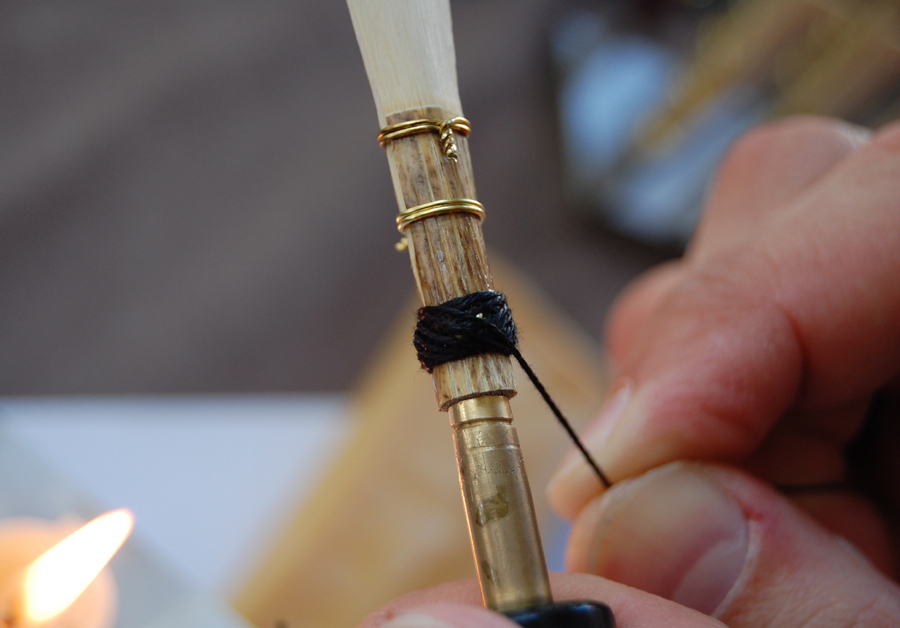
When starting the turban, the wax must be allowed to melt
by holding the reed blank over a candle as you wrap it.
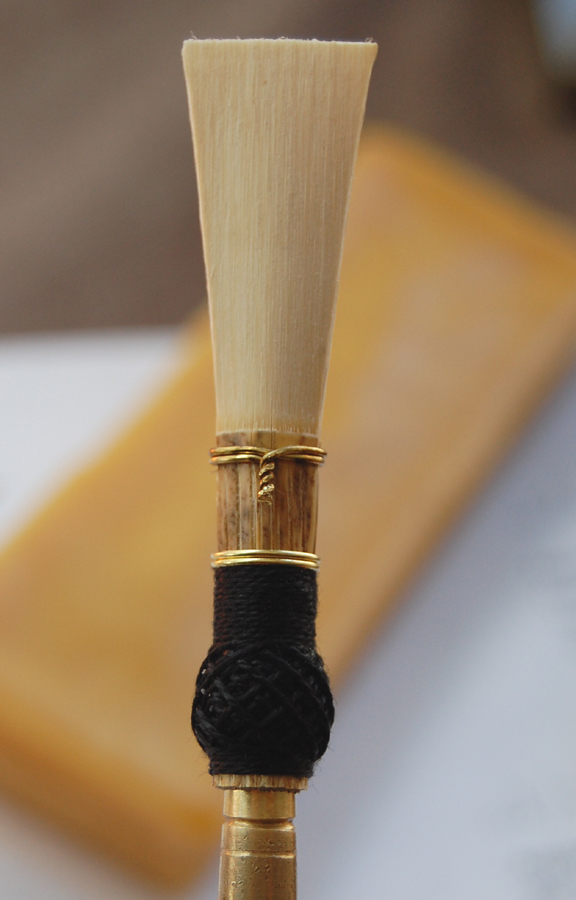
After the turban is finished, more wax is applied.

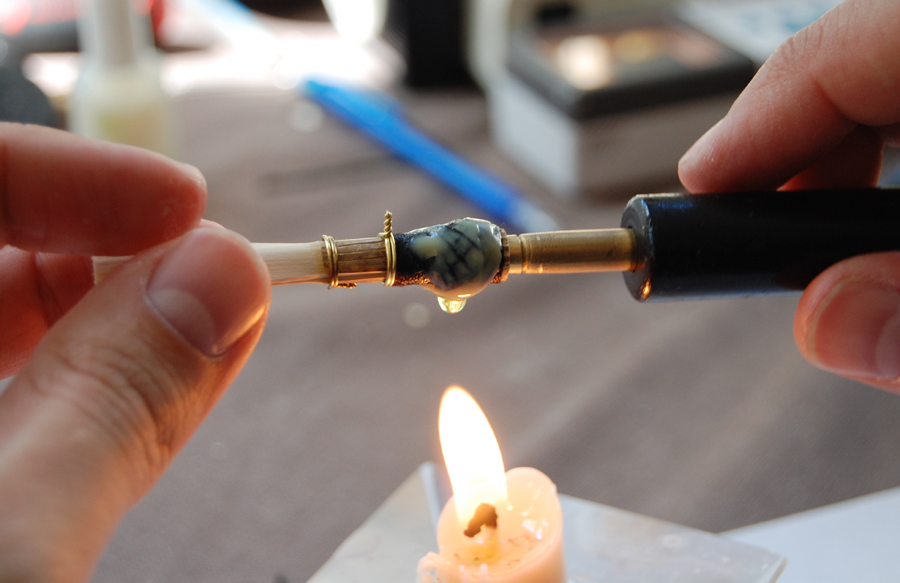
To ensure the wax is soaked into the thread and evenly
distributed, I "rotisserie" the reed blank over the candle.
Allowing wax to drip off is often necessary.
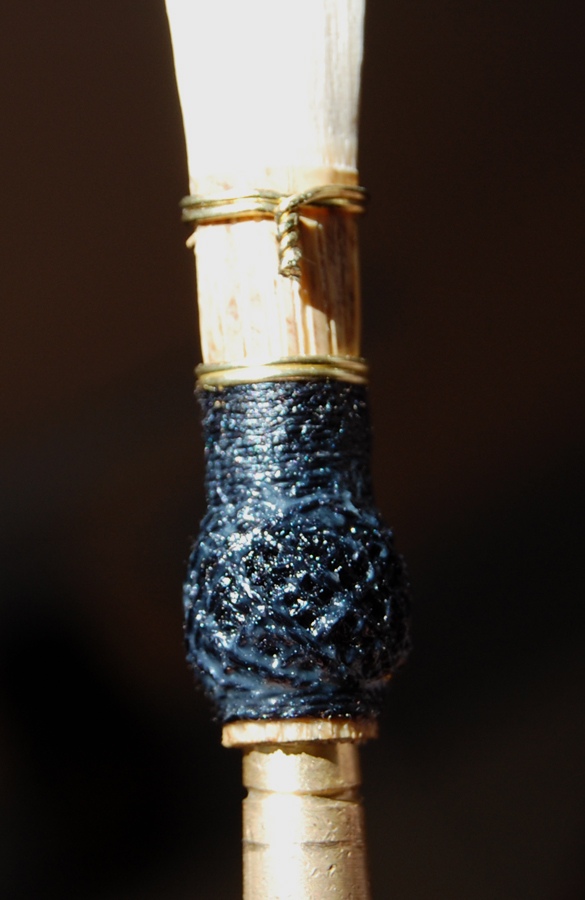
The end result using carnauba wax is a little gnarly and
opaque-yellow, which is why I prefer the water-based nail polish.
I let the blanks sit for 6-12 months before clipping the tips and finishing them into reeds. Sometime during this period, I'll cut a collar using a xacto knife and flat diamond file, when the reed is dry.
I put dates on the tips of the blanks to remind me when they were made.
Hopefully, I can work from a nice stockpile of blanks.
Whenever it's time to finish one, I just check the dates and pick a couple to work on.
Blanks will be ready for finishing in 6-12 months.
- Day 4 & beyond -
Finishing
After the tip is clipped, the fine tuning finishing process begins. This process usually takes about a week. It's important to not over-work a reed in a single finishing session. The reed needs time to dry, adjust, and get played. A couple of days between a few short finishing sessions helps a reed gradually come to life.
I start with a diamond triangle file to remove a bulk of the cane I know is unwanted in general areas of the blades. In the following sessions, I switch to a reed knife to apply some standard scrapes and fine tune any discrepancies in the responsiveness of the cane and reed. Wire adjusting is also performed in these sessions.
For more information about the basic wire adjustments and scrapes I use, take a look at this PDF...
Reed Making/Adjusting Basics - PDF for my students wanting to learn reed making/adjusting
Google Sites
Report abuse